We use cookies to make your experience better. To comply with the new e-Privacy directive, we need to ask for your consent to set the cookies. Learn more.
26
Jul
Master the Art: Essential Tips and Tricks for Rolling the Perfect Joint - A Beginner's Guide
July 26, 2023
 By Admin
Mastering the Craft: Fundamental Tips and Expert Strategies for Crafting the Ideal Joint - A Novice's Manual
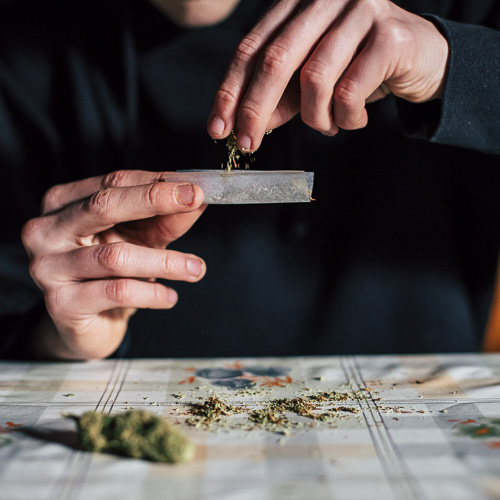
Learning the skill of rolling a perfect joint isn't a mystical secret known only to seasoned cannabis connoisseurs. While it may seem like a straightforward task, rolling a joint skilfully does require attention to detail, patience, practice, and a little bit of know-how. This comprehensive guide will provide you with all the essential tips, tricks, and expert strategies you need to craft the perfect joint, even if you're a novice.
1. Essential Tools for Rolling the Perfect Joint
Before we delve into the art of how to roll a joint, let's discuss the key tools you'll need.
1.1 Quality Cannabis
The soul of a perfect joint is undoubtedly the quality of the cannabis used. Be it sativa, indica, or a hybrid, always choose high-grade, well-cured cannabis. The buds should be neither too dry nor too moist.
1.2. Rolling Papers
There are a plethora of rolling papers available at Olivastu. They vary in size, material, thickness, and even flavours. For beginners, thicker and larger papers such as RAW, Elements or OCB rolling papers can offer better control. Once you get the hang of it, you can experiment with thinner and flavoured papers.
1.3. Herb Grinder
A grinder is a must-have tool for every cannabis enthusiast. It ensures your cannabis is evenly ground, leading to a smoother, more enjoyable smoking experience. You can use a metal, wooden or plastic grinder depending on your preference.
1.4. Filters or Crutches
Filters, also known as crutches or tips, provide support to the joint, prevent the weed from falling out and protect your lips from burning. They can be made from stiff paper, cardboard, or you can buy pre-made ones.
1.5. A Poker
A poker is used to pack the cannabis tightly into the joint. You can use a pen, a small stick, or even a toothpick.
1.6. A Rolling Tray
While not necessary, a rolling tray can help keep the rolling process neat and organised. It catches any fallen bits of cannabis, making it easy to collect and use later.
2. Perfecting the Grind
The first step in how to roll a joint is grinding your cannabis. Use your grinder to break down the buds into a uniform consistency. Avoid grinding your weed into a fine powder as it can clog the joint and hinder the draw. Equally, large chunks can lead to an uneven burn.
3. Crafting the Tip
Creating the perfect tip for your joint is crucial for a smooth smoking experience. The crutch should be rolled into a tight cylinder to hold the cannabis in place. You can create accordion folds at one end and then roll the rest of the paper around it to form a cylinder. The tip establishes the shape and size of your joint and also acts as a handle while smoking.
4. Filling the Joint
The next step in how to roll a joint is filling it with cannabis. Distribute the ground cannabis evenly across the length of the paper, leaving some space at the ends. If you want a cone-shaped joint, place more cannabis towards one end and less towards the crutch end.
5. The Roll
This is the step that requires the most finesse. Hold the paper between your thumbs and forefingers and start rolling it back and forth to shape the cannabis into a cylinder. Apply gentle and even pressure to avoid tearing the paper. With time and practice, you will find the rolling motion that works best for you.
6. The Tuck
Tucking the paper is a crucial step in how to roll a joint. Start at the crutch end and slowly tuck the unglued side of the paper into the joint. Work your way along the length of the joint, ensuring a tight and even tuck. A well-tucked joint will burn evenly and provide a smoother smoking experience.
7. Lick and Stick
Once you have tucked the paper, it's time to seal the joint. Lick the glue strip and stick it down, starting from the crutch end and moving towards the other end. This will seal the joint and maintain its shape.
8. Packing the Joint
After the joint is rolled, it's time to pack it. Packing the joint ensures a slow, even burn and reduces the chance of the cherry falling out. You can use a poker to gently pack the cannabis into the joint. Be mindful not to pack it too tight as it can restrict airflow and make it difficult to draw smoke.
9. The Final Touch
Twist the open end of the joint to seal it. This will prevent the cannabis from falling out and create a convenient wick for lighting the joint. Your joint is now ready to be smoked!
10. Lighting the Joint
Lighting the joint correctly can enhance your smoking experience. Rotate the joint gently while slowly increasing the direct heat from the lighter. This creates a slow-burning cherry right from the tip of your joint and prevents canoeing, where one part of the joint burns faster than the rest.
11. Advanced Joint Rolling Techniques
Once you've mastered the basics of how to roll a joint, you can explore more advanced techniques. Whether it's a cone joint, a back roll joint, or a cross joint, each style offers a unique smoking experience and can be a fun way to impress your friends. However, remember that the key to a perfect joint lies in practice and patience, so don't be discouraged if you don't get it right the first time.
Remember, the art of rolling the perfect joint is not just about the end product, but also about the process itself. Enjoy the journey, take pride in your progress, and happy smoking!
![[Updated] How to Roll a Joint - A Step by Step Guide](https://www.olivastu.com/media/magefan_blog/Featured_1.png)
![[Updated] Old-School Bong: How to Make A Water Bottle Bong?](https://www.olivastu.com/media/magefan_blog/bottle-featured.jpg)